Three years ago we made this video of Pet Day. Some of you star in it!
Briar- Sugary drinks Timetable
P3 11.40-12.10 Rm 3-4
READING /WRITING
We can talk about this together.
* Read the recount about Grandparents' Day that Room 4 wrote last year.
*Can you find the joining words? Are there many examples?
*Are there some words that precisely describe something?
*What about examples where Room 4 deliberately gave background information?
*Did they meet the PURPOSE of the writing, which was to entertain and inform parents, and people in our community.
*Find some techniques the writers used to try to make this writing interesting.
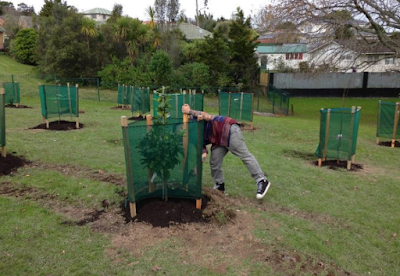
Tree Stuff - We need to tell our parents about the fruit trees we are getting .
Orchards In Schools Project Plan
Pre Orchard planting day preparation:
Services – School to confirm location of services (Plumbing and Electrical) prior to installation
Gardening Mix Delivery – Will be delivered prior to Orchard installation date.
Trees Deliveries – To school prior to installation date. School to provide secure storage area.
Locations for all Trees to be marked out with 4 metre spacing. Each location will have a circle
sprayed on the ground indicating hole size. This will be 500mmx500mm wide.
Wheelbarrows and Tools – School and community will need to bring own wheelbarrows.
Community and school will also need to supply spades, shovels and mallets.
Participants – Nominated School staff (Including a Horticulture champion from school or
community), Minimum 14 people from community.
Methodology - Orchard planting day:
KidsCan will supply all the raw materials and plants needed to create the Orchard. To follow is a step
by step description of how the Orchard will be established:
1. Locations for all Trees should have been marked out (prior to planting day) with 4 metre
spacing. Each location will have a circle sprayed on the ground indicating hole size. This will
be 500mmx500mm wide to allow the plants to establish a strong root base.
2. Holes to be dug in a square/box shape – This promotes root growth.
3. The depth of the hole will be 400mm. Once this depth is achieved, all soil placed next to the
hole.
4. Gardening mix will then be added at a ratio of 50/50. Return mixed soil to the hole and fill till
level. Note that garden mix is organic material, it will decompose.
5. Tree is to be removed from protective wrap and placed in the centre of the hole. Top half of
tree roots will need to be “teased” to break up the soil and promote root growth. This will
need to be done carefully with hands whilst being careful not to damage the roots. Set 1/3rd
of plant base into soil.
6. Remaining space around the hole is to be built up with mixed soil so that the plant sits
proudly above the ground. See picture below.
7. Once trees are planted, water the soil immediately.
8. 3-4 x Timber stakes are to be hammered into the ground until secure. Length of stakes to be
1500mm.
9. Once the first two stakes are set in place, the tree is to be secured to two of the stakes with
materials supplied. This will stabilise the tree in the developing stages. Materials supplied
will degrade as the tree matures to ensure tree growth is not impacted or harmed.
10. Tree and stakes to be wrapped and secured with staples provided for ongoing protection for
developing tree.
We also need to tell parents about all the tree work that has been done in the holidays...Have you noticed? Why do you think it happened? Who did it?


No comments:
Post a Comment